
Here is a quick and easy way to use Microsoft Project to generate a responsibility matrix within your project schedule. This example follows the RASCI method (responsible, accountable, supported, consulted, informed).
Definitions
Responsible – The resource responsible for completing the work to achieve a task or make a decision. Only one resource should be responsible for a task, but additional resource(s) can be delegated to assist in completing the work (supported).
Accountable – Resource accountable that tasks are completed correctly and thoroughly. Delegates work to responsible resources, but can also be both accountable and responsible. Only one resource must be accountable for a task or deliverable.
Supported – Resource(s) allocated to assist those responsible to complete tasks. May be multiple resources. Unlike consulted, who may provide input, supported resources assist in completing the tasks.
Consulted – Resource(s) whose opinions are sought after to assist in completing a task, but are neither responsible or accountable for the quality or timeliness of the work completed. May be multiple resources.
Informed – Resource(s) who must be kept up-to-date on the progress and completion of tasks or deliverables.
Custom Fields
For the responsible field, use the Resource Names field. For the remaining fields, use custom text fields with no additional settings. You could use a lookup for accountable since only one person should be accountable per task, but the other fields may require multiple selections.
- Responsible (Resource Names)
- Accountable (Text1) *Lookup*
- Supported (Text2)
- Consulted (Text3)
- Informed (Text4)
Custom View
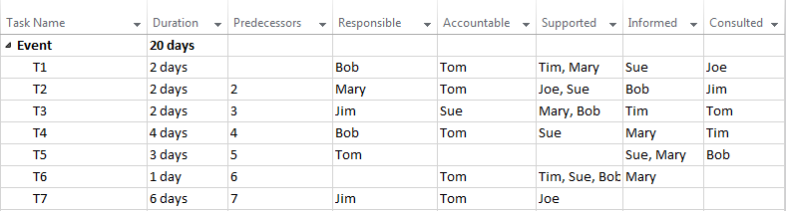
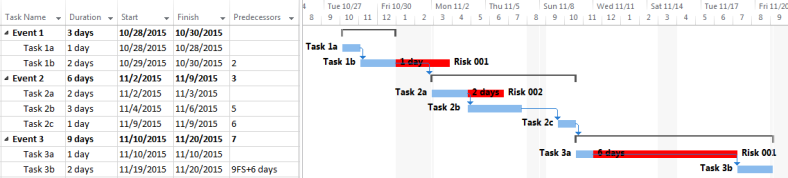
Once the fields have been created, create a view for the responsibility matrix input by adding the custom fields to the Task Sheet view and save as a new view.
Custom Reports
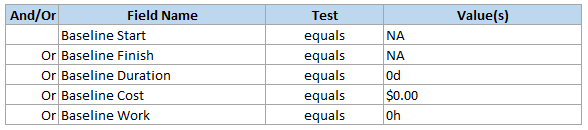
Next, create a custom table report with the following fields: Task Name, Responsible, Accountable, Supported, Consulted, and Informed. The field list settings are as follows:
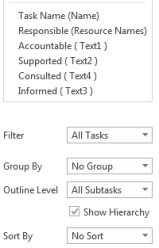
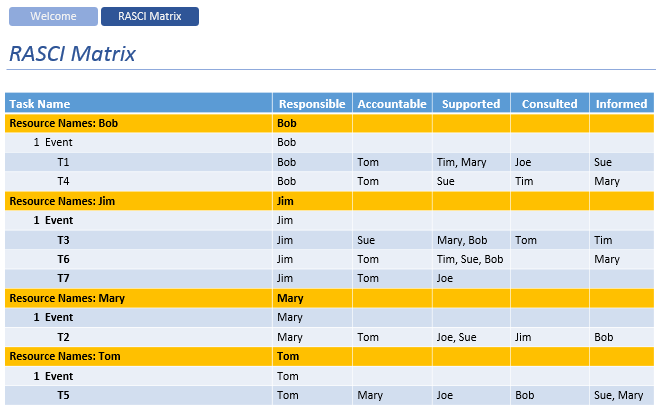
The output will be a matrix table resembling the table shown below.
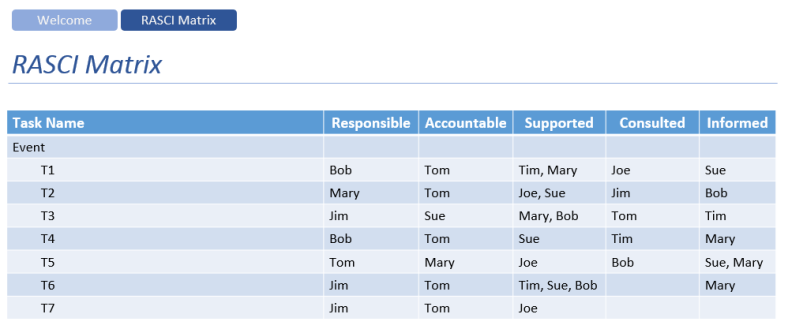
Additionally, you can add a “Group by” filter to manipulate the layout of the table. Below are two examples of the same table grouped by the accountable and responsible fields.
Accountable:
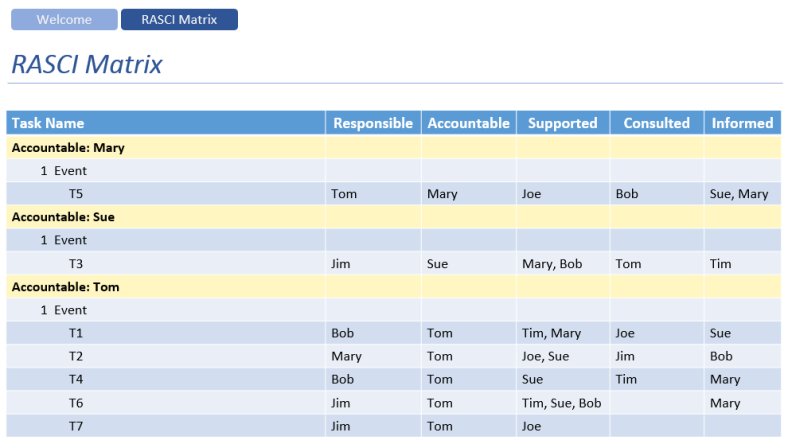
Responsible:
Summary
This is a quick and easy setup for integrating a responsibility matrix into your project schedule with the flexibility to add more functionality and create dynamic project schedules.


